Back in December when I was on Winter Break, I decided to hit up the local Goodwill. I was looking for a chair for our living room for a desk that we have yet to buy (Yes, sometimes I'm that person that does things backwards like buy a skirt and then have to buy a top to go with it). Then I saw it.....just what I was looking for!
And the price was well within my budget at $6.99! A sweet lady approached me and told me what a nice piece of furniture it was (SO heavy) and how to take the seat out to recover it. I also bought a lamp that I have plans to repaint (I will post on that when I do).
On the way home I stopped to buy fabric to recover the seat and paint from Home Depot. And yes, hubby (if you ever decide to read this), I can find my way around Home Depot without you! My husband was a little worried when I randomly called to ask where we keep the sandpaper and paint brushes! I'm not much of a handy woman around here! When I got home I went straight to work.
First, I removed the seat cushion with a screwdriver. Then, I lightly sanded the entire chair with some fine-grit sandpaper. After I painted one coat, I recovered the seat cushion while it dried. All I did was center the fabric up (so the print would look right) and staple it with a staple gun at the back.After the first coat had dried, I applied a second. When the second coat had dried, I sanded the edges of the chair to give it a more "worn" look.
This is a close-up of the yummy looking seat before...
I was thrilled with how the chair turned out! I'm sure it's meant to be at a dining room table or desk, but for now, it's sitting in our living room. It's way to cute to not be shown off! And it goes well with the mustard theme that I've got going on right now in our living room!
And here she is in all her glory! This is the finished product!
(Just a reminder that earlier I did mention this project was undertaken in December. My Christmas tree is NOT still up! I felt the need to clear that up!)
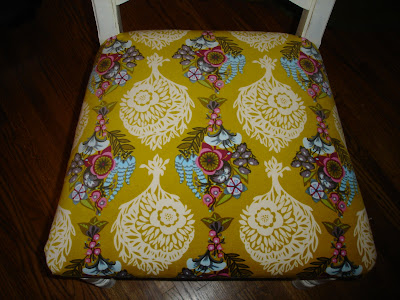
And here's a close-up of the seat after...
(LOVE the fabric)
Well, there you have it! My very first DIY project! Not rocket-science, I know! But I'm pretty happy with how it turned out (if I do say so myself!).


No comments:
Post a Comment